


Finishing the HMI for the pool automation project
This is a tutorial for an outdated version of the REX Control System. Please follow the up-to-date Getting started guides listed below:
This tutorial is a sequel to the introductory tutorial on using the RexHMI extension for Inkscape. It starts right where the previous tutorial ended therefore it is highly recommended to read the two tutorials in order.
In the end, you will be able to generate graphical HMI accessible from any modern web-enabled device (smartphone, tablet, notebook).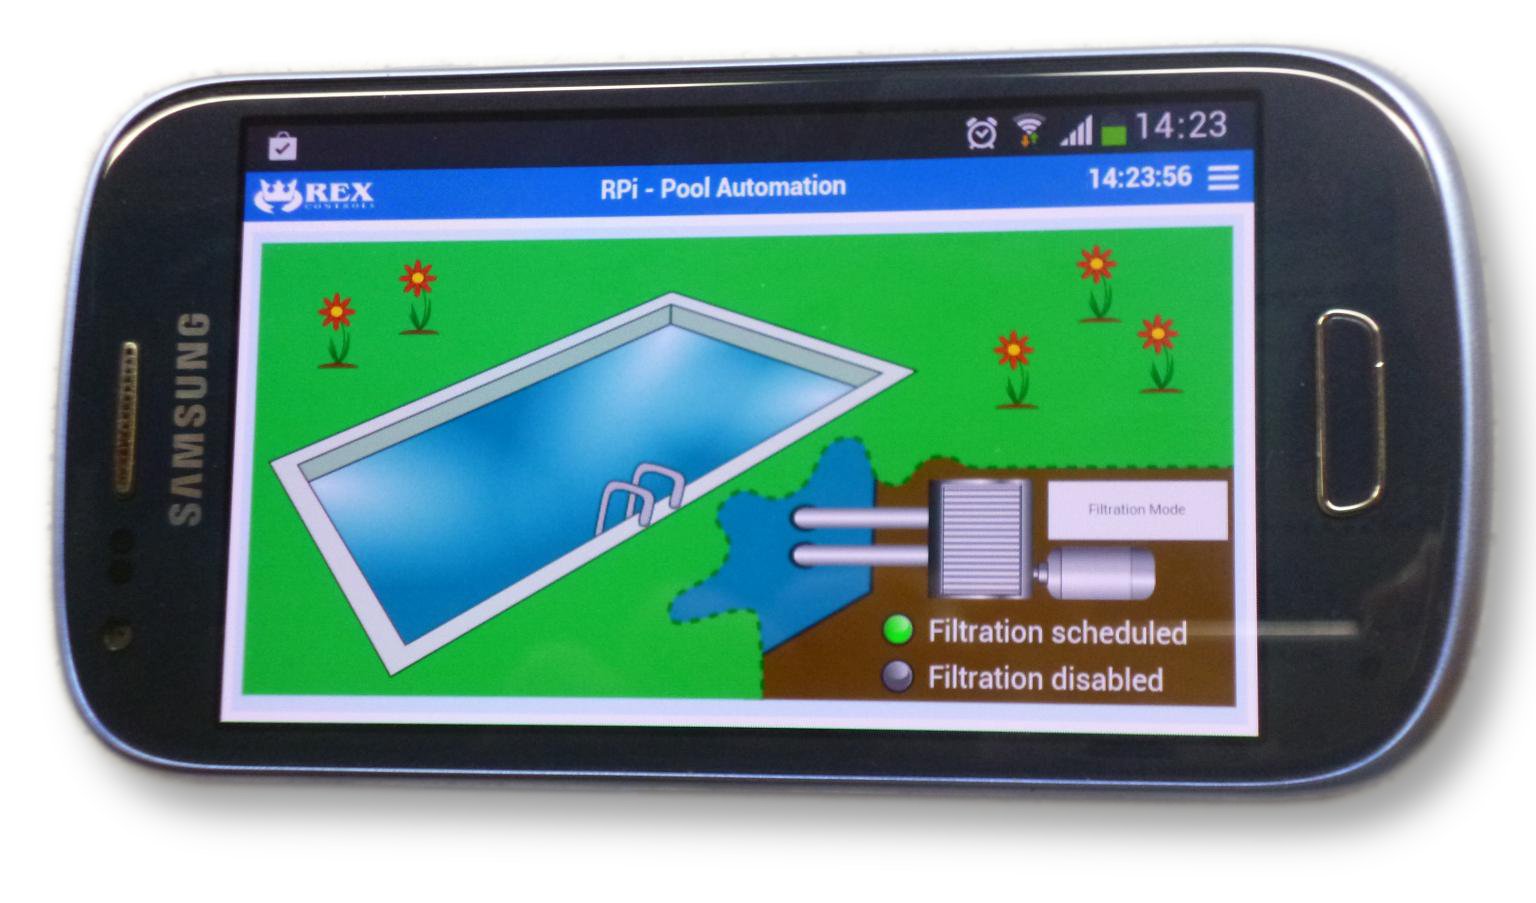
RexHMI extension for Inkscape
The RexHMI extension for Inkscape is our answer to a question, 'Could I develop professional HMI without coding?' Yes, you can!
The RexHMI extension allows you to generate fully functional HTML-based HMI for the REX control algorithms. The first tutorial described various group animations in Inkscape drawings and this tutorial is focused on including graphical elements from the RexHMI library in your HMI.
Prerequisities
In order to continue in the tutorial, make sure that:
- You have the Inkscape with RexHMI extension installed on your desktop PC.
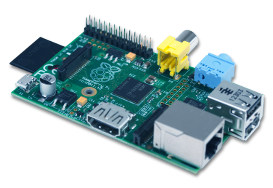
- RexCore, Lighttpd and RexWSTcp are running on your Raspberry Pi.
ps -A | grep RexCore
ps -A | grep lighttpd
ps -A | grep RexWSTcp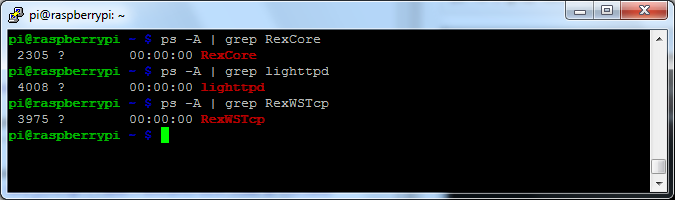
- The pool automation algorithm is running on your Raspberry Pi.
- If you need a hint on any of the above mentioned prerequisities, please refer to the previous tutorial on RexHMI extension for Inkscape.
HMI development using elements from the RexHMI library
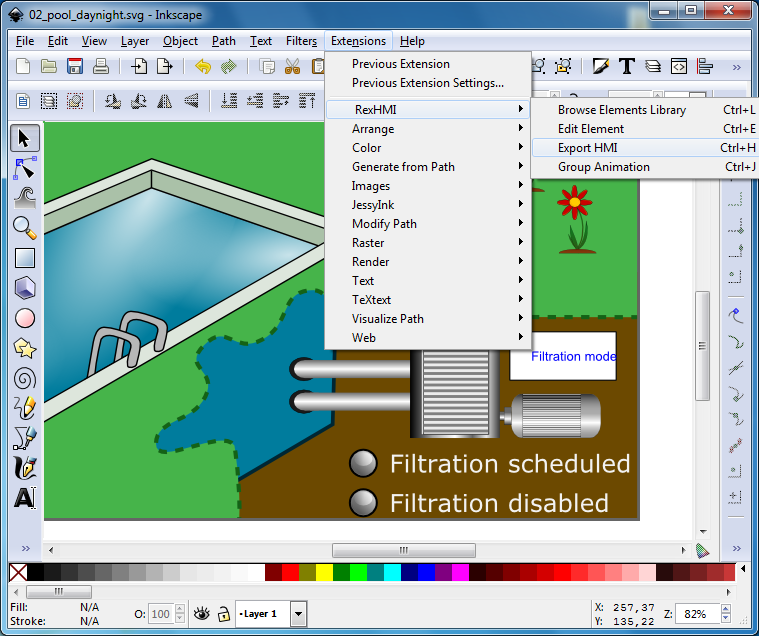
Run the Inkscape with RexHMI extension and open the 02_pool_daynight.svg file from the HMI_sourceSVG directory in downloaded project files. This drawing is the final product of the previous tutorial as well as the starting point for this one.
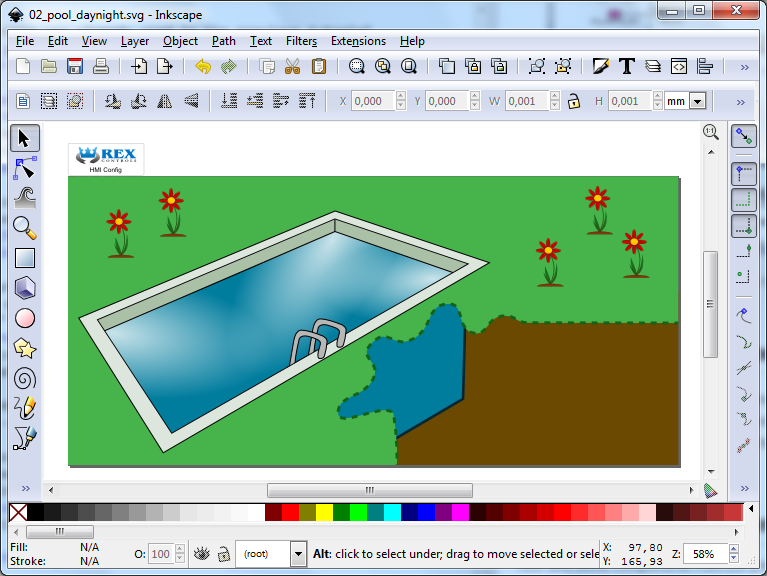
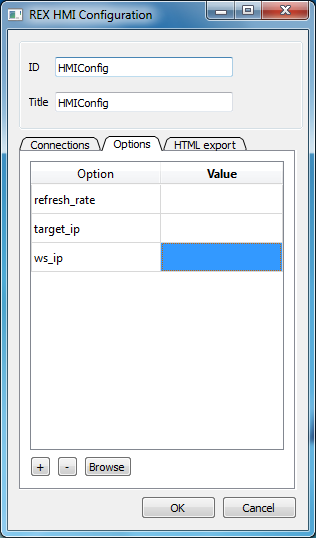
There is apparently something missing in the lower right corner of the drawing. This area will be filled with filtration pump and control elements. But you will need a few more signals from the control algorithm to connect these elements to. Select the HMI Config element and call the Edit Element tool from the top menu or press Ctrl+E. The HMI Config object stores all information about your HMI project. Every time you will need to make some changes in the project settings just select the HMI Config object and call Edit Element tool. This object is present only in Inkscape and is excluded during the HTML export.
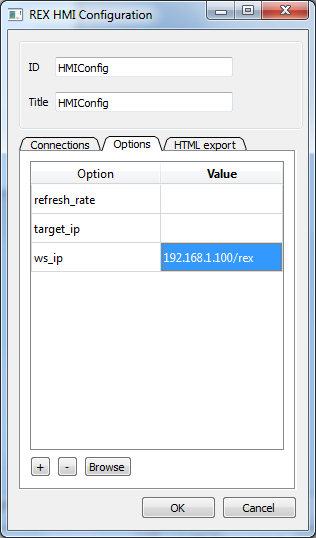
Go to the Options tab and type the IP address of your Raspberry Pi with trailing /rex into the ws_ip row. This will allow Inkscape to connect to the RexWSTcp server running on your Raspberry Pi and you will be able to browse the signals of the running control algorithm.
Click the Browse button and you will be switched to the Connections tab. Notice that the signal tree appears in the right part. Add new aliases called: BUTTON_FILT, FILTRATION and FILTRATION_MODE. These signals will be used for animating the elements from RexHMI library according to the state of the control algorithm.
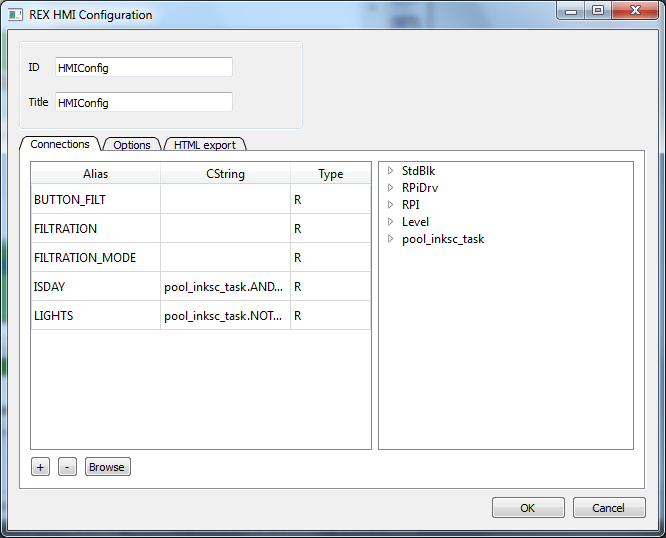
Select the cell in the CString (Connection String) column next to the BUTTON_FILT alias, unfold the tree of the control algorithm and find the MP_BUTTON function block. Unfold it once more and you will see the BSTATE parameter. Double-click this item. The full signal path will appear in the aliases definition. This signal will control the MP_BUTTON block in the algorithm, therefore it has to have the write access to the block. For that, choose 'W' (Write) in the Type column.
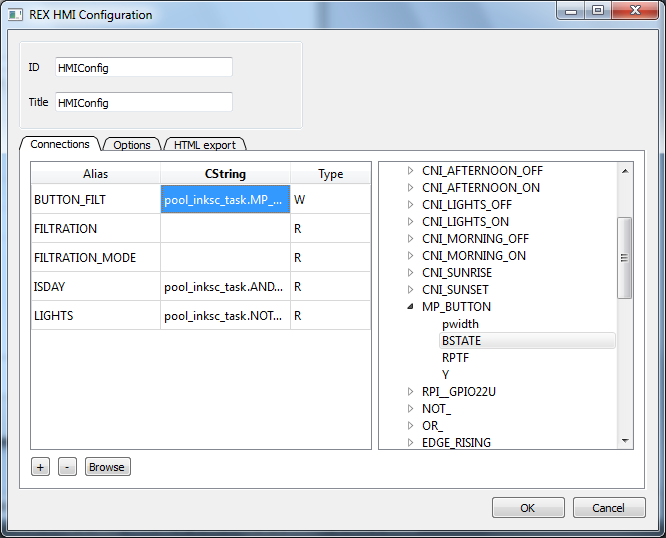
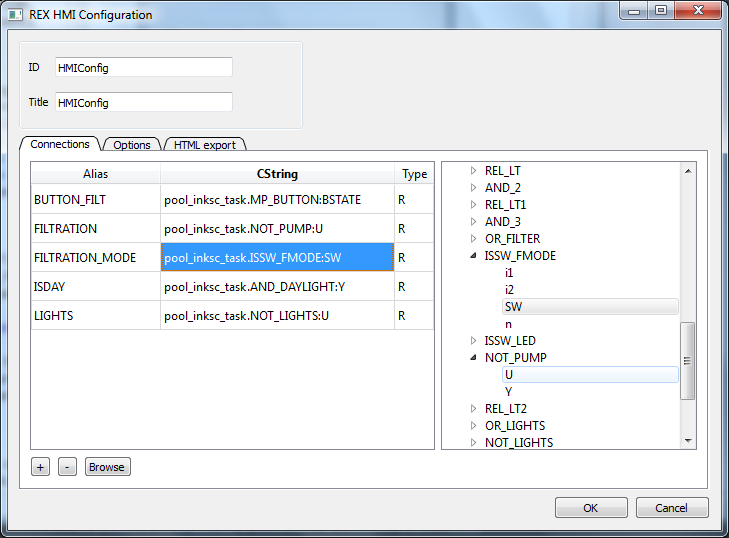
Now connect the FILTRATION alias with the U input of the NOT_PUMP block and the FILTRATION_MODE alias with the SW input of the ISSW_FMODE block. These signals will be used for indicating which filtration mode is set and whether the filtration pump is running or not.
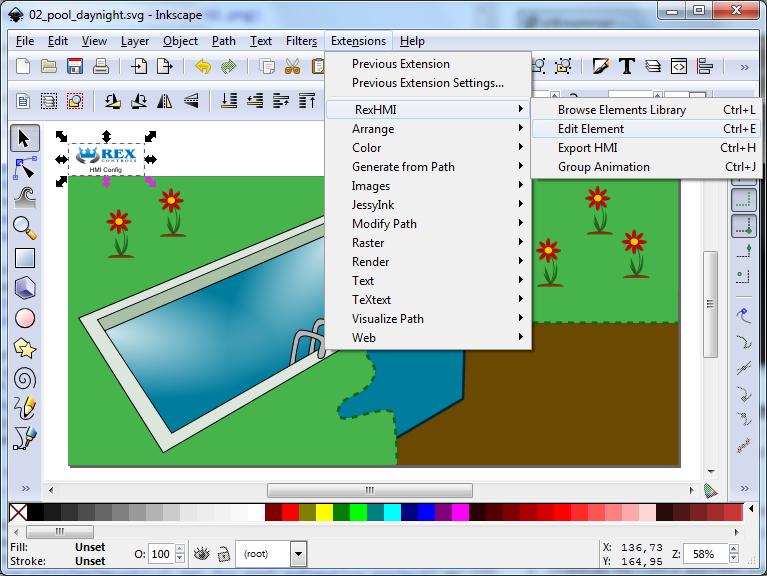
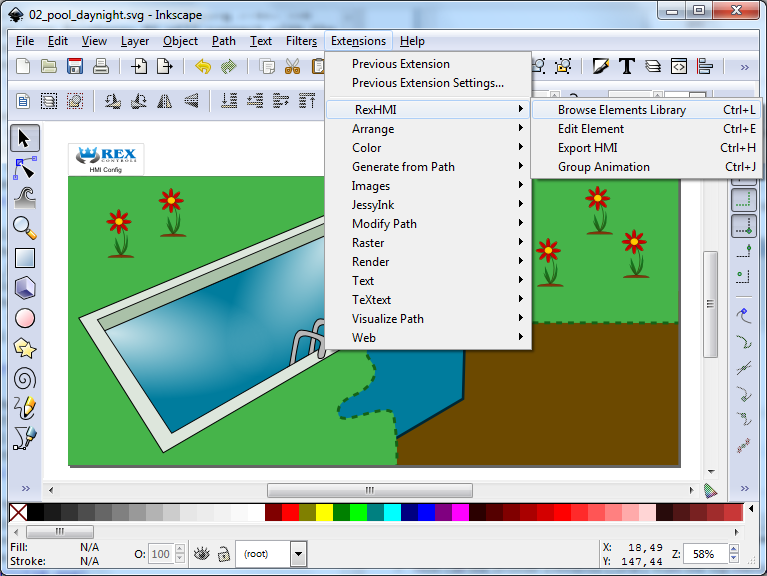
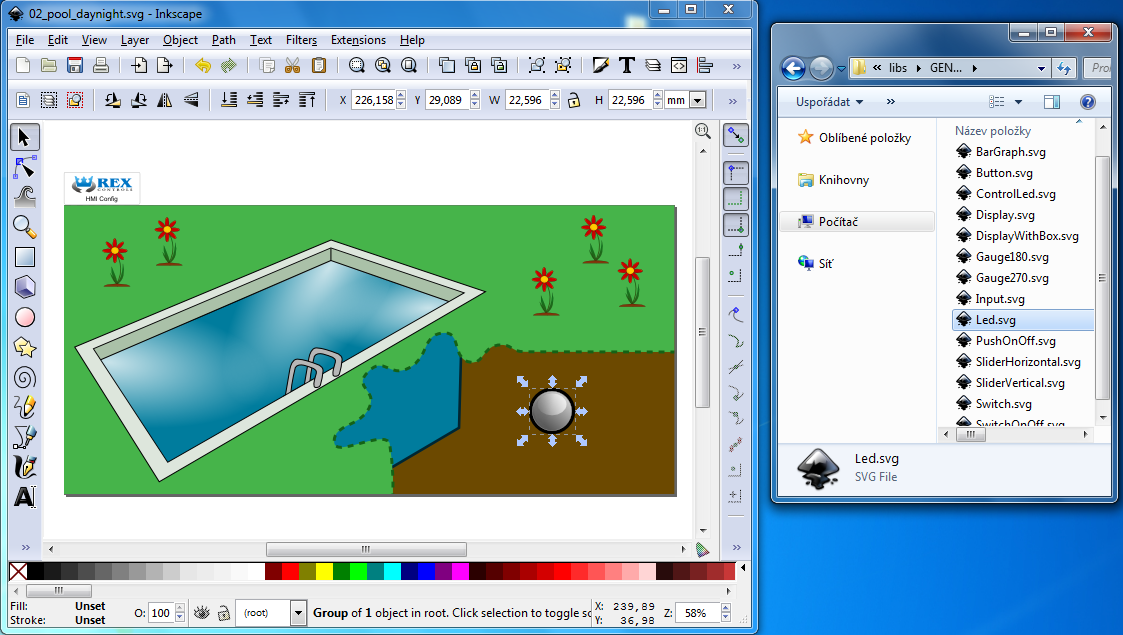
Now call the Browse Elements Library from the top menu or by pressing Ctrl+L. This tool will open the folder with the RexHMI library elements.
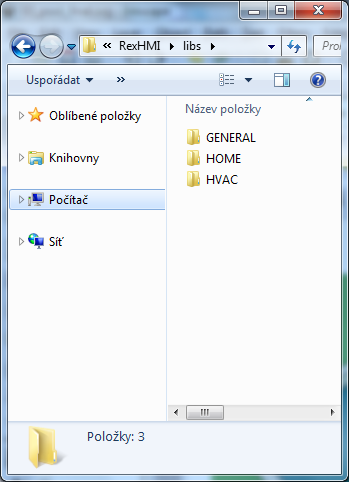
Simply ‘drag&drop’ any of the prepared components to your HMI drawing in Inkscape. At this moment the library is composed of three groups: the GENERAL group contains various inputs and gauges for general purpose, in the HOME group you can find common elements of home automation projects and the moreorless schematic HVAC group is focused on HMI for heating, ventilation and air conditioning. Remember that you can always create and animate your own objects using the elementary animations described in the introductory tutorial on using the RexHMI extension for Inkscape.
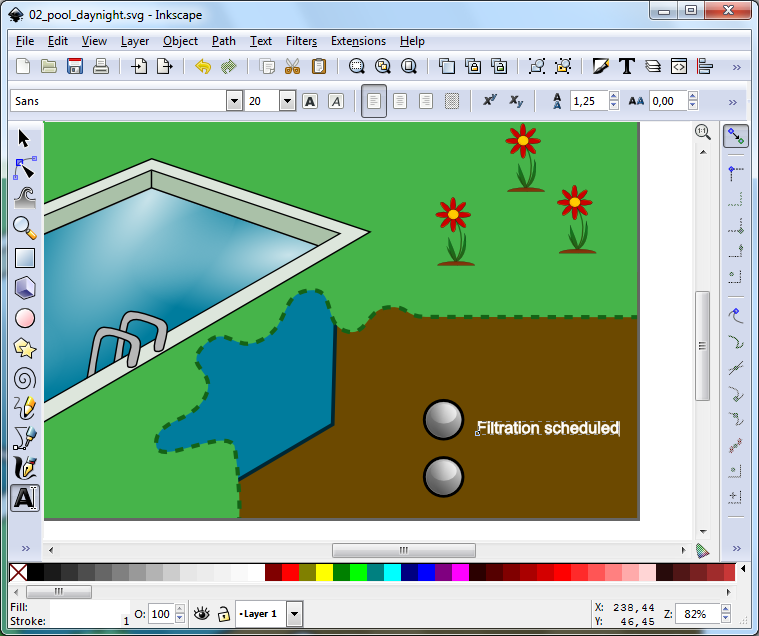
Drag and drop the ‘Led.svg’ file into the drawing from the GENERAL library. You will need two of them, therefore duplicate the LED using Ctrl+D or Ctrl+C and Ctrl+V combination. One will indicate that the filtration is scheduled, the other will be used when the filtration is disabled.
Add text labels using the Text tool in Inkscape. You will find it in the left menu bar or press F8. Click into the drawing and you can insert custom text labels.
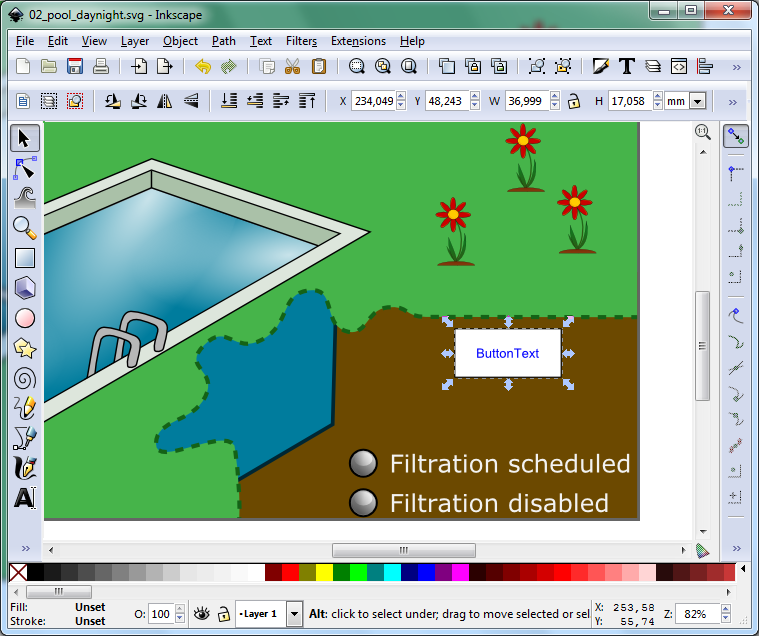
Include the Button from the GENERAL library as well.
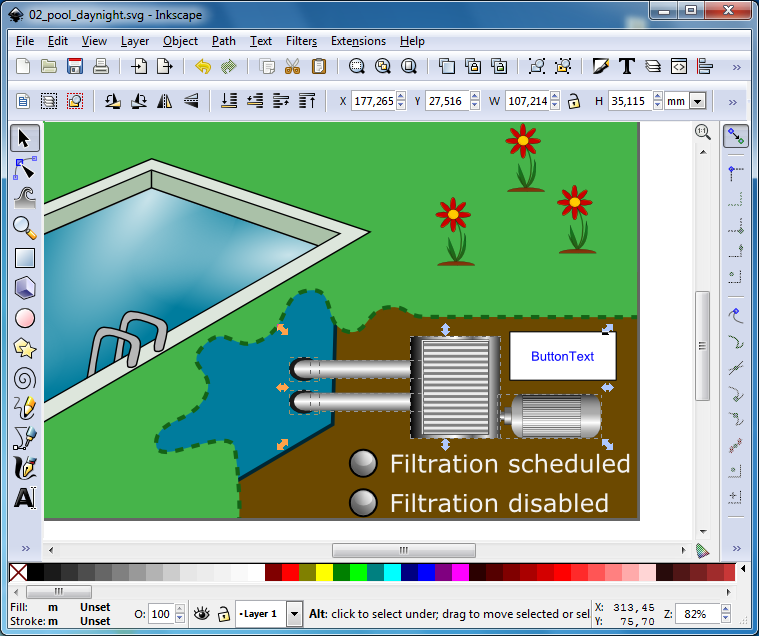
The other elements you will need to visualize the filtration system are located in the HOME library, namely Pipe, Pipe ending, Filter and Motor. Drag and drop these components and place them in the lower right corner of the drawing.
The components are in their places, now it's time to link them with the aliases and configure the animations. Select the first LED next to the 'Filtration scheduled' label and open the Edit Element dialog. Click the Browse Aliases button, select the cell next to the POWER label and double-click the FILTRATION_MODE alias. The filtration is scheduled when the FILTRATION_MODE signal has the value 0 (it is the SW input of the ISSW_FMODE function block, remember?). That's why we will select the 'runColor' grey and the 'stopColor' green. This means that the LED will be grey for FILTRATION_MODE=1 and green for FILTRATION_MODE=0. Note that the meaning of the signals is in fact reversed so be careful and do not mix up the values.
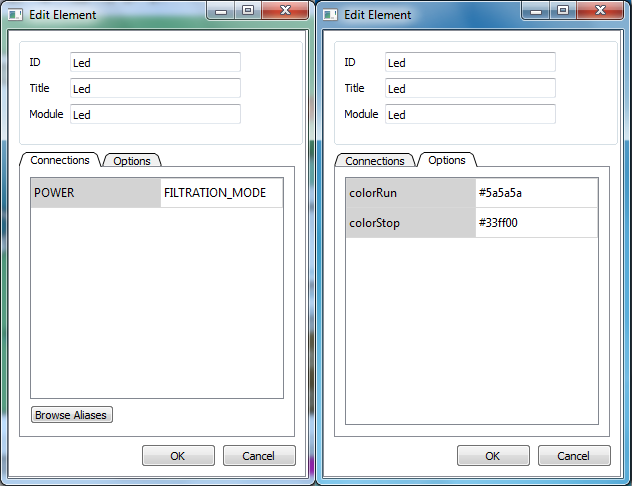
The other LED will signalize that the filtration is disabled. The LED will have grey color as long as FILTRATION_MODE=0, therefore the 'stopColor' is grey. The LED will turn red when FILTRATION_MODE=1, therefore 'runColor' is red. Note that the meanings of the signals correspond with each other in this case.
Now you will edit the properties of the filtration system consisting of the motor, pipes and filter. All these elements should indicate whether the filtration is running or not. Use the Edit Element dialog and add the FILTRATION alias in the connection tab of every filtration system element.
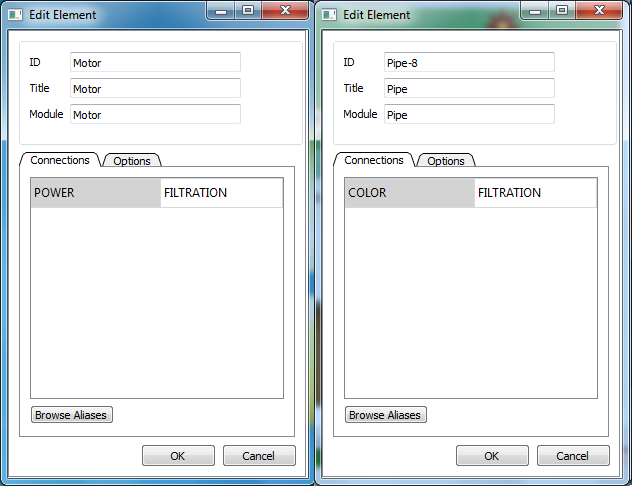
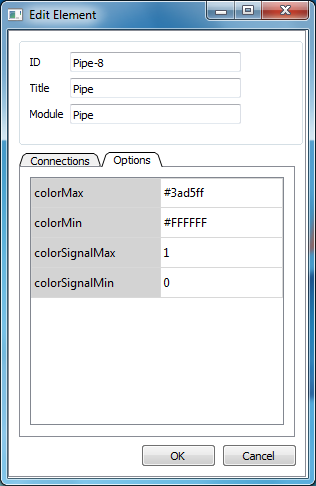
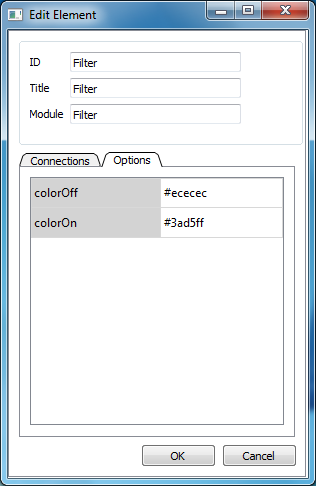
Edit the colors of all pipes according to the following table. The result is that the pipes turn blue when the filtration is running, otherwise they are grey.
To achieve similar behavior in the water filter, set the 'onColor' to blue and 'offColor' to grey again.
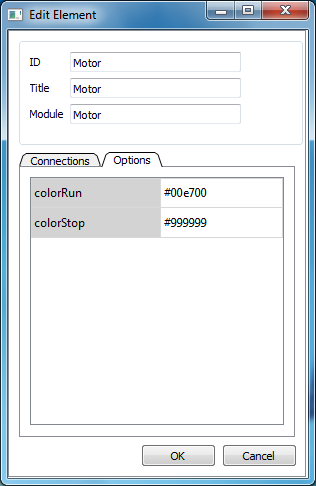
The color settings of the motor are different, it should turn green when the filtration is active.
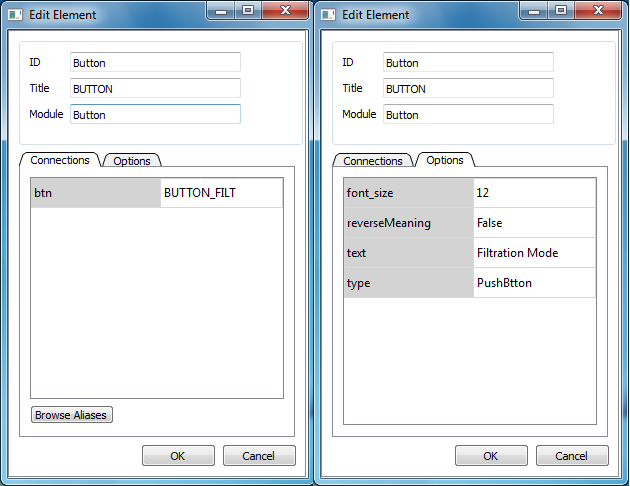
The last component to configure is the Button. Open the Edit Element dialog and link the element with the BUTTON_FILT alias. Switch to the Options tab and change the text parameter to Filtration Mode. This is the caption of the button.
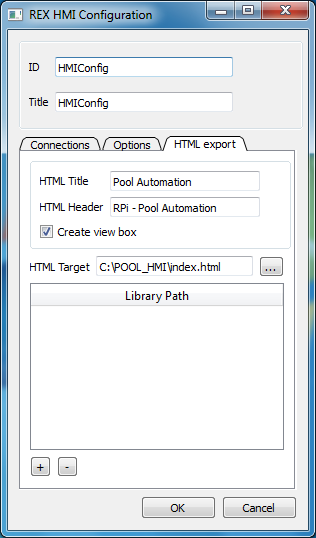
The next step is to generate the HTML5 page in order to verify the functionality of your HMI. Select the HMI Configuration element and run Edit Element. Switch to the HTML export tab and enter the name of the main HTML file of the web-based HMI. It is strongly recommended to export the HMI to a blank folder, because there will be a number of supporting files generated along. Also it is necessary to have a separate directory when transferring the HMI into your Raspberry Pi.
Execute the Export HMI command from the menu or press Ctrl+H. The Inkscape drawing will be transformed to HTML and all the necessary files will be generated to the chosen location.
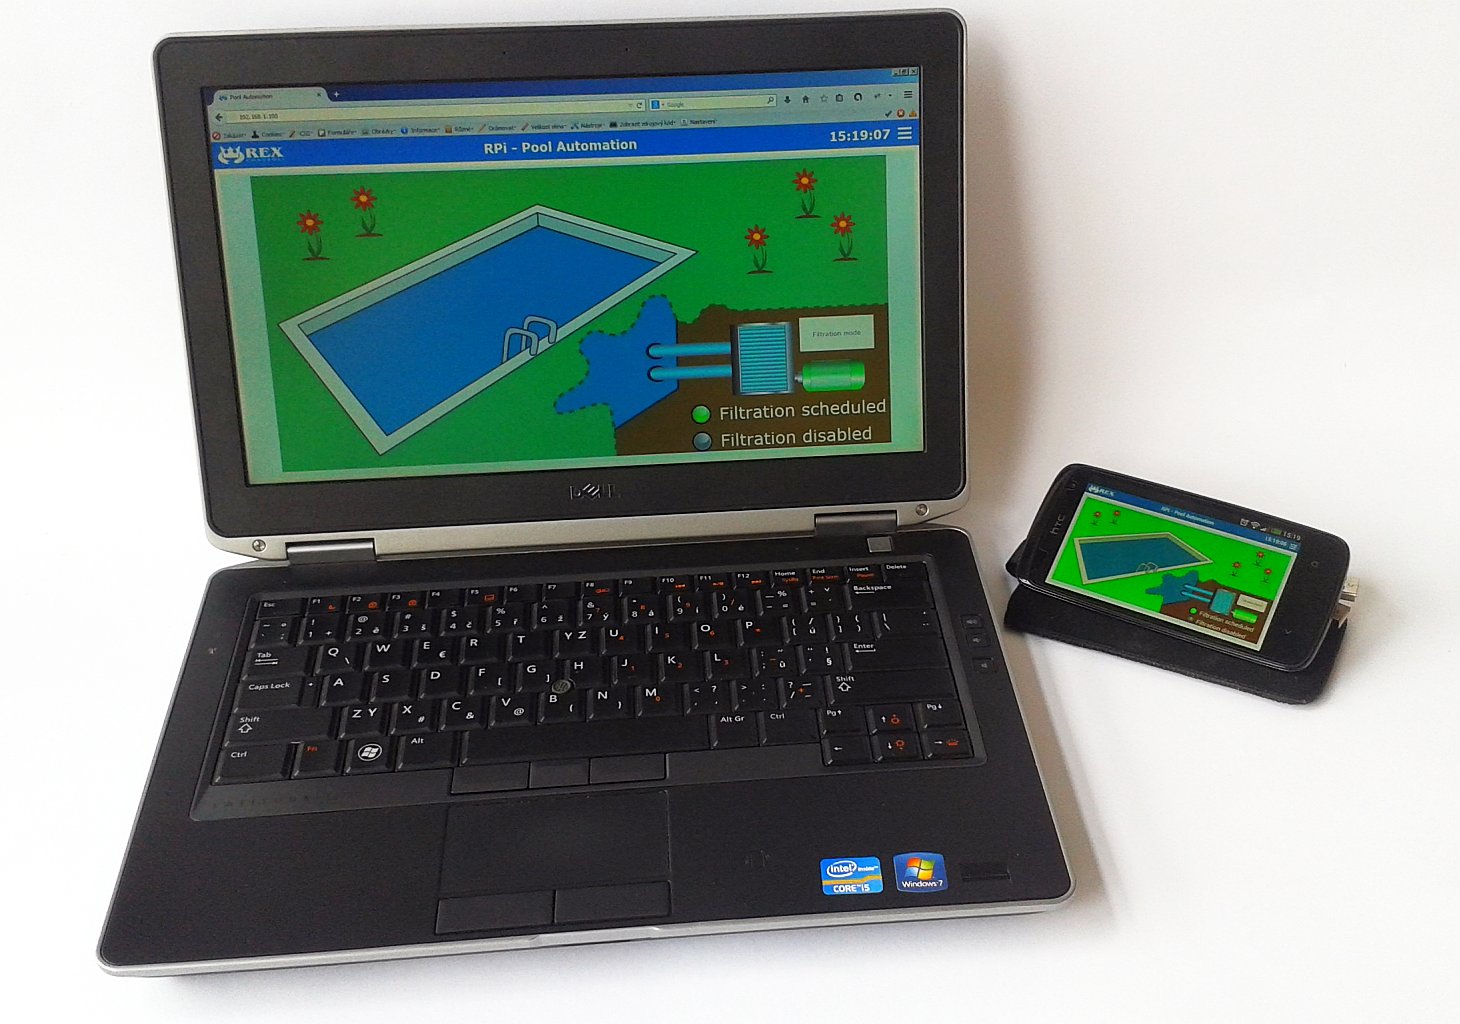
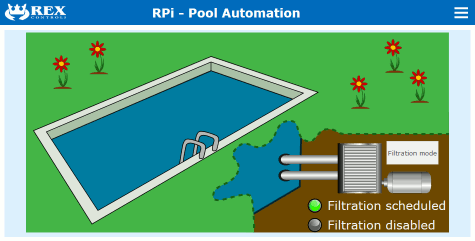
Locate and open the generated HTML file in your browser. The button switches the filtration mode. The mode is indicated by the corresponding LED. When the filtration runs, the pipes turn blue and the motor turns green. See a few possible screenshots of the HMI for pool automation:
Migrating the HMI into your Raspberry Pi
So far, the HMI is stored in your desktop computer and the HTML5 page communicates with Raspberry Pi using the websocket protocol. The next step is to move the whole HMI to your Raspberry Pi, so that you can see the HMI on every device in your home network.
Get back to Inkscape and switch to the Options tab in the HMI Configuration dialog. Erase the address of the websocket server in the ws_ip row. The control algorithm, websocket server and web server will run on a single machine (your Raspberry Pi) so there's no need to specify the addresses.
Generate the HMI using Export HMI tool again. After that the HMI is ready for copying into your Raspberry Pi.
- At this moment you have the same HMI which can be found in our GitHub repository. The SVG source is the file 03_pool_final.svg in the HMIsource directory.
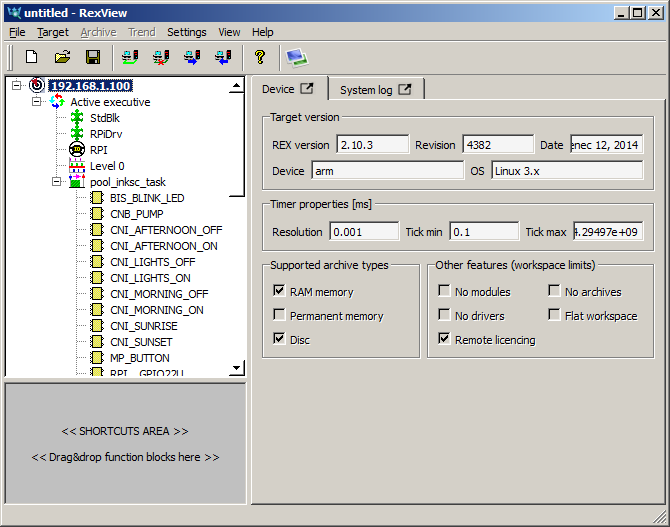
Copy the HMI to your Raspberry Pi using the RexView program.

Switch to your web browser and enter the IP address of your Raspberry Pi in the address field. You should see the HMI. Now try to access the HMI on your laptop, tablet or smartphone!
Troubleshooting
Got stuck at any point? Found a bug? Missing a feature? We want to hear about it, do let us know.
Additional information
You can also:
- Explore the other graphical elements in the RexHMI library.
- Read the Getting started guide and watch our Getting started video which both explain a PID control loop example.
- Explore the rich function block library of the REX Control System.
- Visit the Raspberry Pi Foundation webpage, where you can find more information about the Raspberry Pi minicomputer.
Raspberry Pi is a trademark of the Raspberry Pi Foundation.
updated: 2017-05-19