


Graphical HMI for pool automation project
This is a tutorial for an outdated version of the REX Control System. Please follow the up-to-date Getting started guides listed below:
What is the REX Control System?
I want to know!
The previous tutorial on creating HMI for the pool automation project illustrated the stucture of RexHMI components and described the process of developing and deploying the HMI on your Raspberry Pi. This tutorial is focused on a different and probably more appealing way to create HMI for control algorithms of the REX Control System.
RexHMI extension for Inkscape
In the case of WebBuDi HMI one has to edit HTML files by hand and that is something our users are willing to avoid the most. Therefore we have developed the RexHMI extension for Inkscape, the free professional vector graphics editor.
You do not need any additional licence, everything works even with the 2-hour demoversion of the RexCore runtime module so you can get started immediately!
Installation
Simply download the InkscapeRexHMI installer and run it on your Windows PC. It is the standard version of Inkscape, only the RexHMI extension is added and the underlying Python is updated. It will not interfere with existing installation of Inkscape if you are already using it.
Once Inkscape with RexHMI is installed, you will be able to generate HTML-based HMI with a few clicks of your mouse.
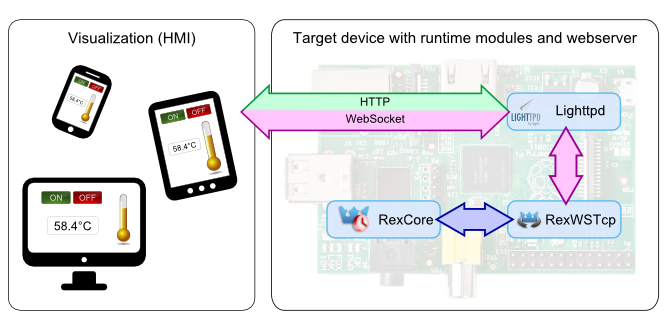
The individual components of the RexHMI family were described and installed in the previous tutorial so you already know what's happening between the user and the control algorithm, right?
Make sure that both the Lighttpd webserver and the RexWSTcp websocket server are running on your Raspberry Pi. Please refer to the previous tutorial on WebBuDi HMI for the REX Control System if these two are not installed yet on your Raspberry Pi.
Running the control algorithm for pool automation
The control algorithm is practically the same as in the original tutorial on pool automation, only one modification was done: A signal telling us whether it is day or night was added.
- First download the project files from our GitHub repository. It is most convenient to download the whole repository of examples in the form of a standard .zip file. The files are located in the RaspberryPi_examples\04_PoolAutomationInkscape folder. If you are familiar with Git and GitHub server, you will probably use the direct link to the REX Control System examples repository.
- Upgrade the Development tools of the REX Control System on your desktop PC to the newest version if you have not done it yet.
- Upgrade the REX Control System runtime on your Raspberry Pi to the newest version if you have not done it yet..
sudo apt-get update
sudo apt-get upgrade
- You already know how to run the control algorithm on your Raspberry Pi, don't you? If you need a hint at this moment, visit the introductory tutorial on using the REX Control System on Raspberry Pi.
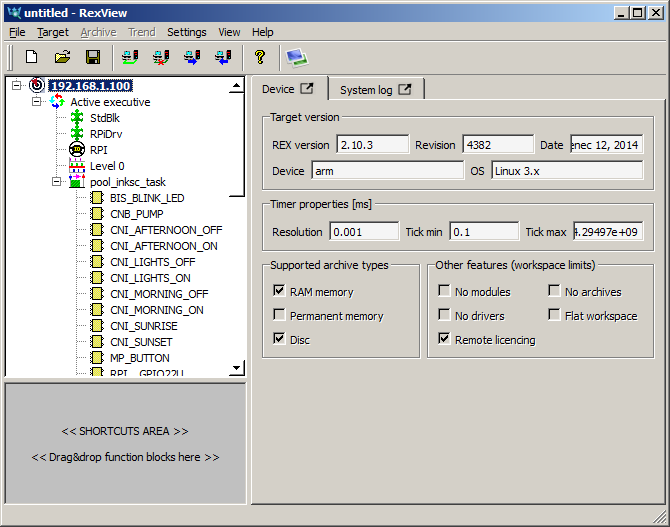
- Connect to your Raspberry Pi using the RexView diagnostic tool and check that the control algorithm is running. Unfold the tree view of the running algorithm and you must see all the function blocks which are included in the project.
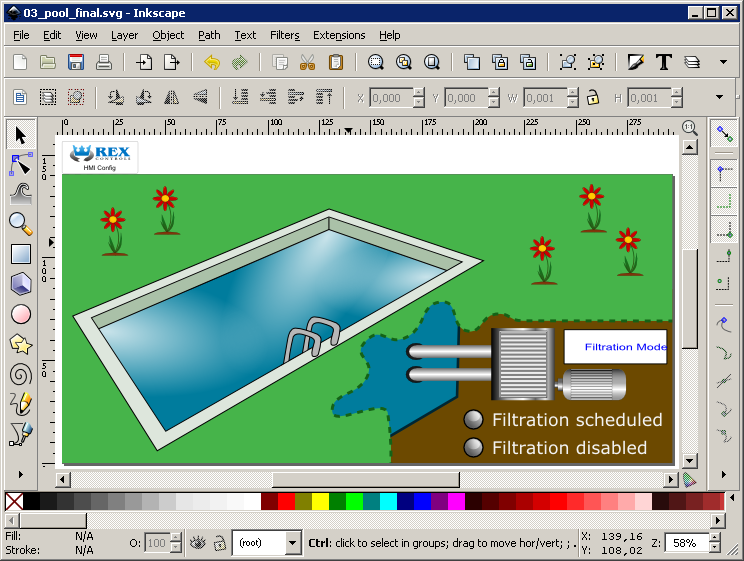
- Now when the control algorithm is running, it is time to create the graphical HMI in Inkscape.
Creating the first HMI in Inkscape
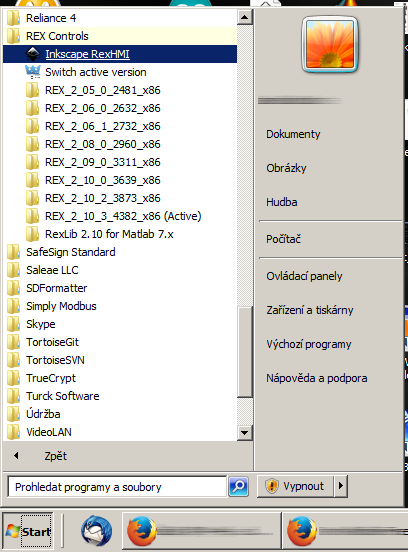
- Run the Inkscape with RexHMI extension from the Start menu.
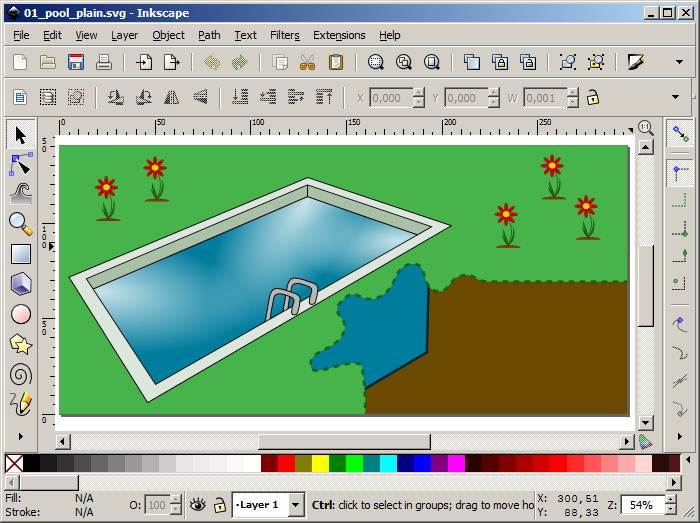
- Open the 01_pool_plain.svg file from the HMIsource directory, which is part of the example project. Or you can use your own graphics, there is no need to suppress the artist in you.
- Basic knowledge of Inkscape is assumed. If you have never used Inkscape before, we recommend the tutorials on the official Inkscape website.
- In general, you can animate any Group of objects according to the variables of the REX control algorithm. For starters you will learn how to animate lights to mimic the real ones and hide flowers and change grass color according to daytime.
- First you need to define the signals which will be used to animate the drawing. You will need two signals, one for the lights and the other one will tell whether it is day or night. Both of these signals are available in the control algorithm.
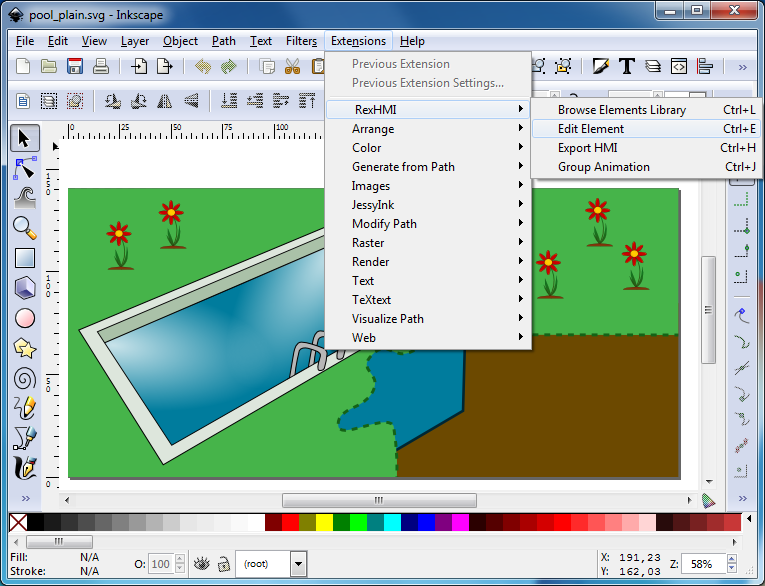
- To link the drawing with the signals of the control algorithm, make sure no object is selected (simply click anywhere outside the drawing) and select Extensions->RexHMI->Edit Element from the menu or press Ctrl+E.
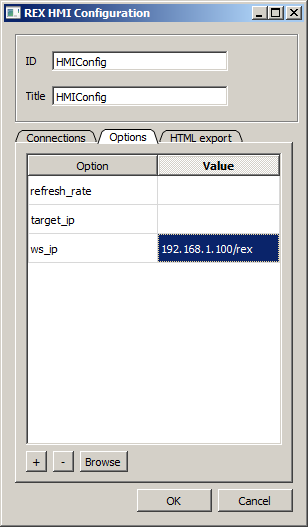
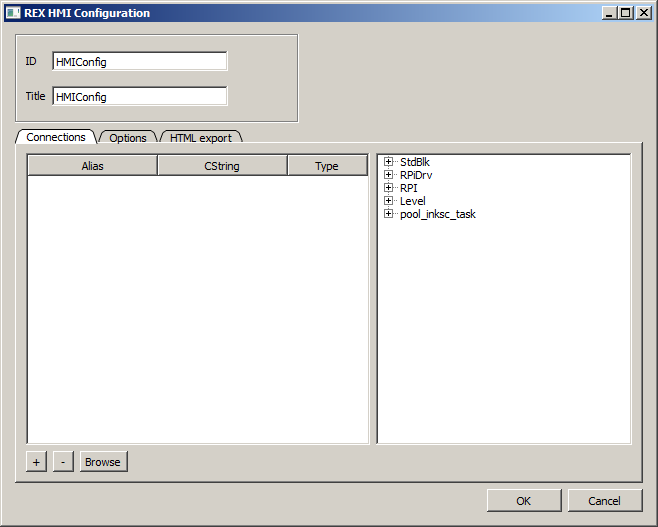
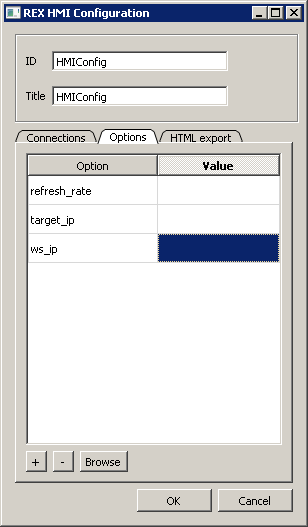
The RexHMI configuration dialog will appear. - First you need to tell where to get the signals from. Switch to the Options tab and set the address of the RexWSTcp websocket server as shown below. Replace the IP address with the address of your Raspberry Pi and do not forget the trailing /rex!
- Click on the Browse button and the tree-view of the control algorithm running in your Raspberry Pi will appear. Note that this is the same tree as shown in the RexView diagnostic program.
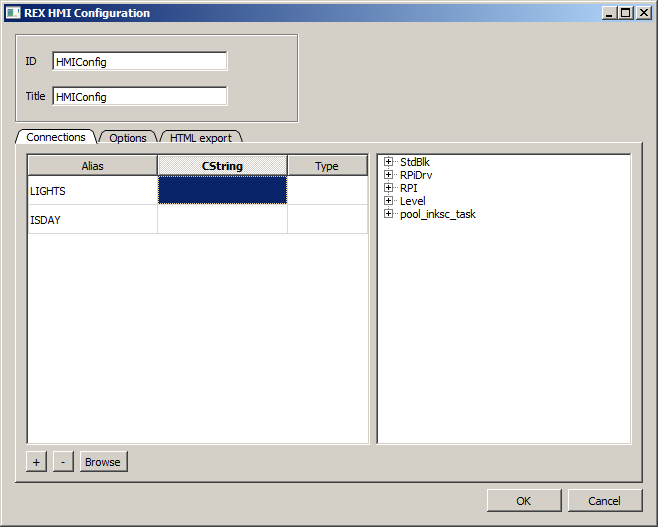
- Add two aliases and name them LIGHTS and ISDAY. The meaning of these two signals is described below. Then place the cursor in the CString field (Connection String) of the LIGHTS alias.
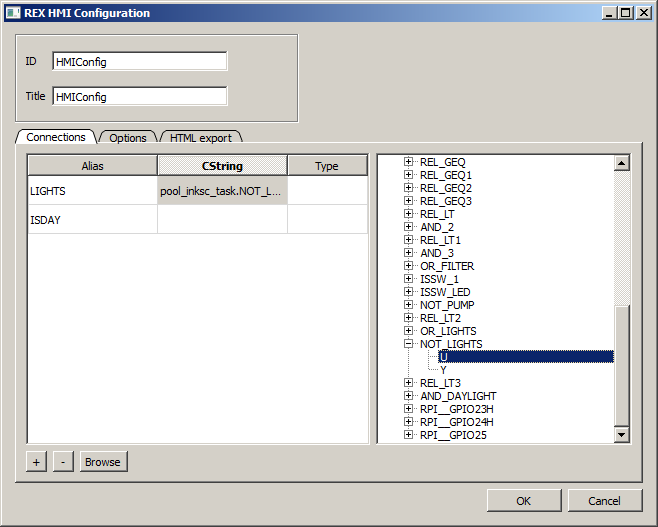
- Find the U input of the NOT_LIGHTS function block in the tree and double-click it. The connection string will appear in the alias definiton. This signal will tell whether the real pool lights are on or off (the relay board has inverted logic, remember?).
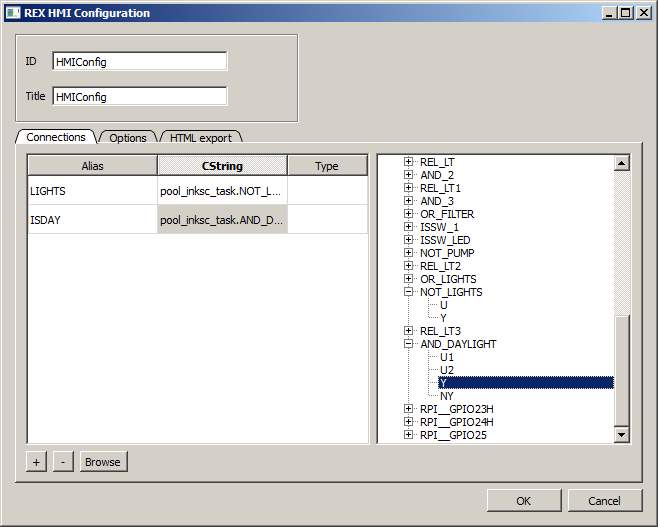
- Do the same for the ISDAY alias, only this time link it with the Y output of the AND_DAYLIGHT function block. This signal tells us if it is day or night.
- Close the dialog by clicking the OK button. Notice the HMI Config object which appeared in the top left corner. This object only stores the configuration of your HMI and will be excluded from the drawing when you export the HMI. Anytime you need to change the configuration or add and remove aliases, simply select this object and press Ctrl+E.
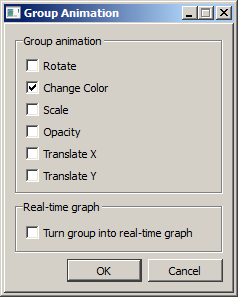
- Now when the signals are defined, it is time to animate the individual elements in the drawing. Click on the grass and select Extensions->RexHMI->Group Animation from the menu or press Ctrl+J.
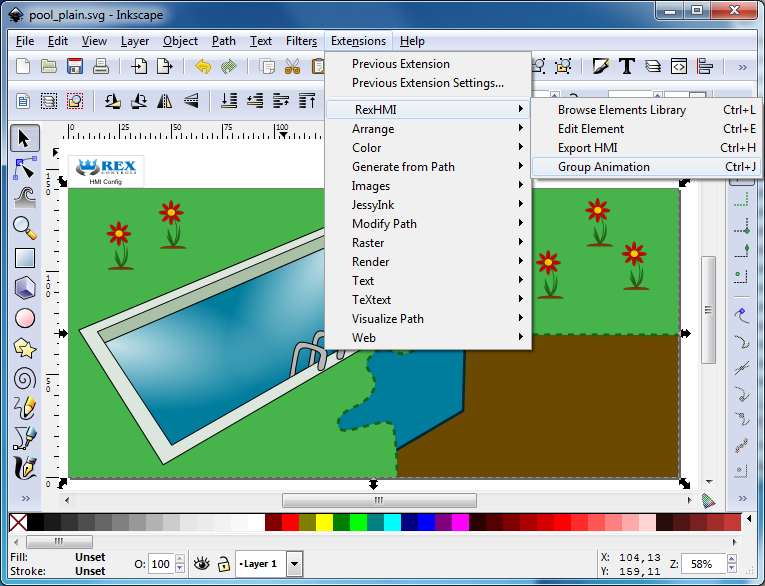
- Tick the Change Color animation and click OK.
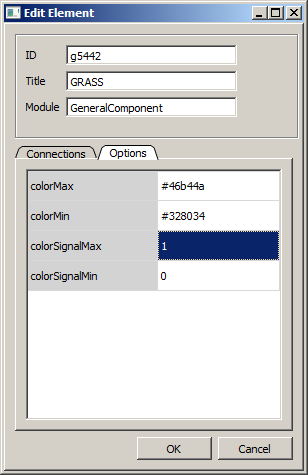
- Select the grass again and select Extensions->RexHMI->Edit Element from the menu or press Ctrl+E. Link the COLOR variable with the ISDAY alias as shown below. Click the Browse Aliases button to show the list of known aliases.

- Switch to the Options tab and define the colors which will be used throughout the day (light green) and at night (dark green). The animation is based on a Boolean signal, therefore the range of the signal must be set accordingly.
- The other animation symbolizing day and night is based on hiding the flowers. Click on any of the flowers and press Ctrl+J. This time select the Opacity animation.
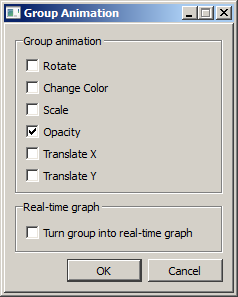
- Click OK and select the flowers again. Press Ctrl+E to edit the animation options. Link the animation with the ISDAY alias.
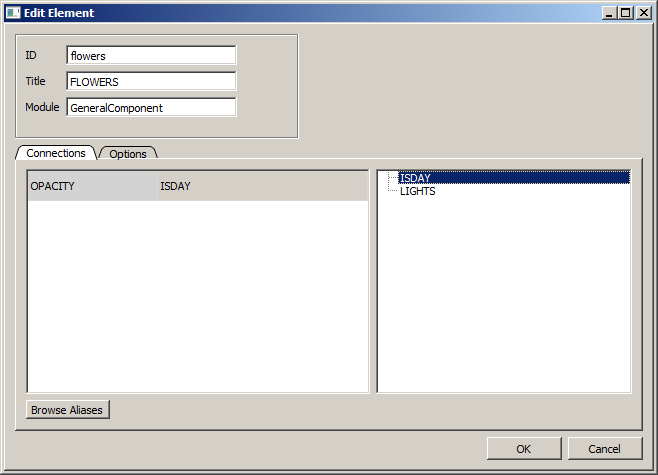
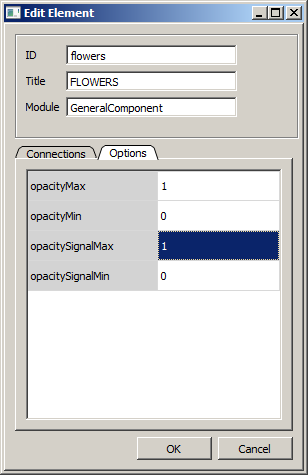
- You want to hide the flowers (Opacity=0) at night (ISDAY=0=opacitySignalMin). Throughout the day, the flowers are visible (Opacity=1, ISDAY=1=opacitySignalMax).
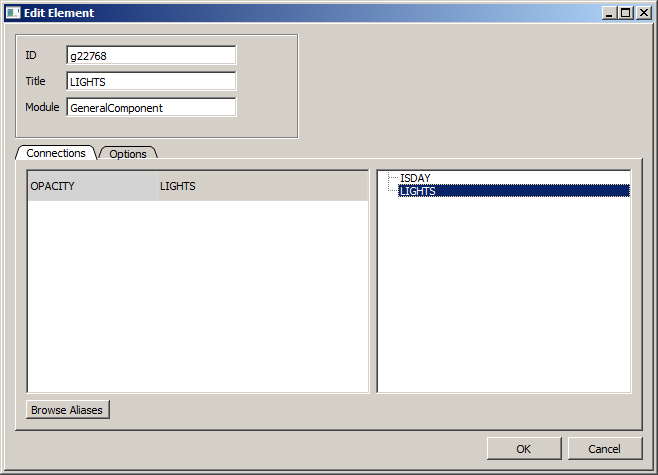
- The last element to animate are the pool lights at the moment. Select the lights in the pool and press Ctrl+J. Just like in the case of flowers, select the Opacity animation.
- Select the lights again and press Ctrl+E. Link the animation with the LIGHTS alias.
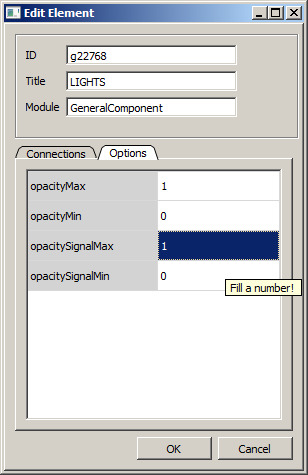
- Similarly to the flowers, adjust the options to hide the pool lights when the real lights are off.
- Click OK and now it is time to export the HMI for the first test.
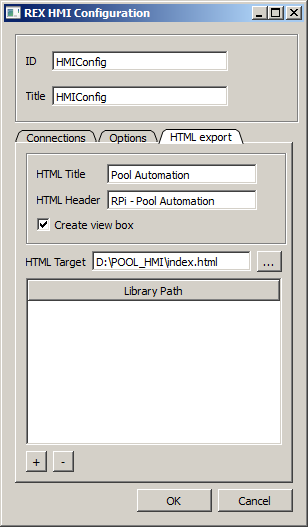
- Select the HMI Config object and press Ctrl+E. Select the HTML export tab and set a filename to export the HMI into. Always put this file inside some folder, it is necessary for copying the HMI into your Raspberry Pi using the RexView program.
- Click OK and select Extensions->RexHMI->Export HMI from the menu.
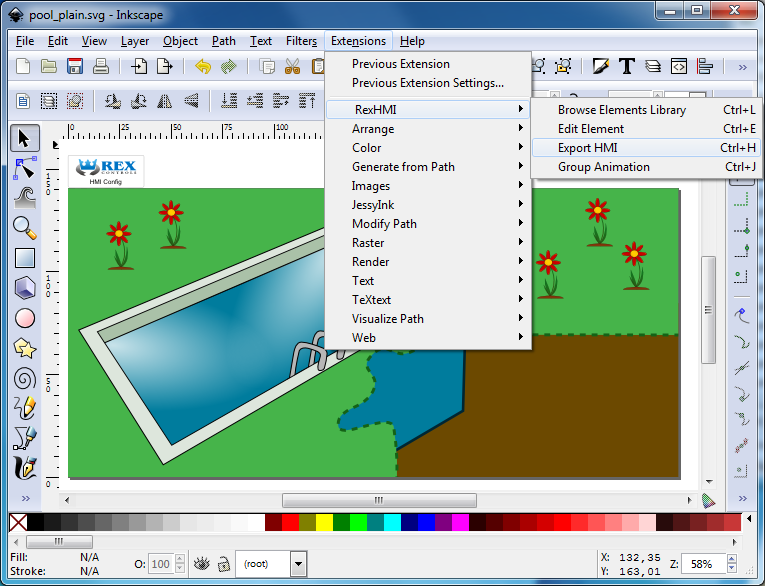
- The HMI is generated to the specified folder.
Verifying the generated HMI
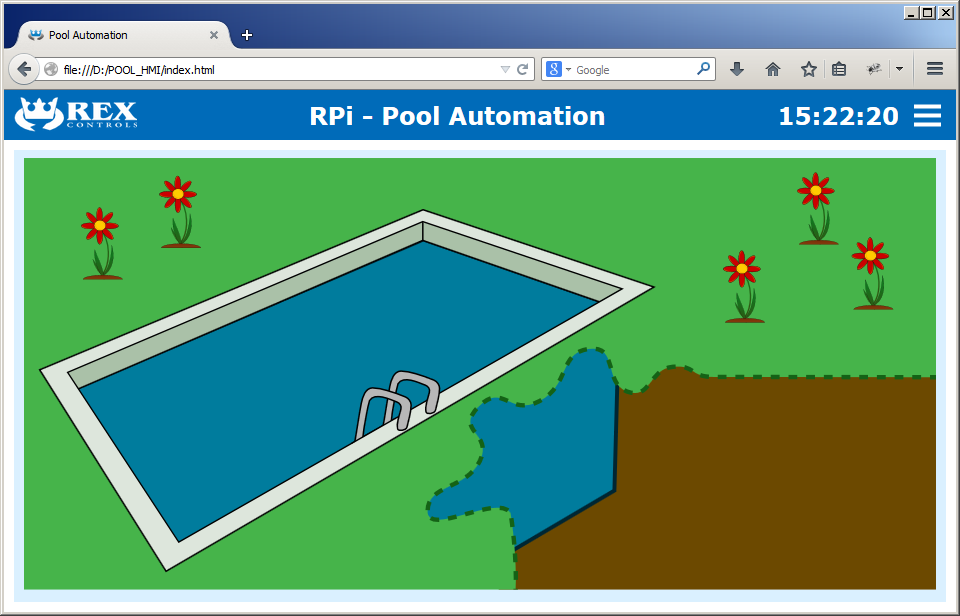
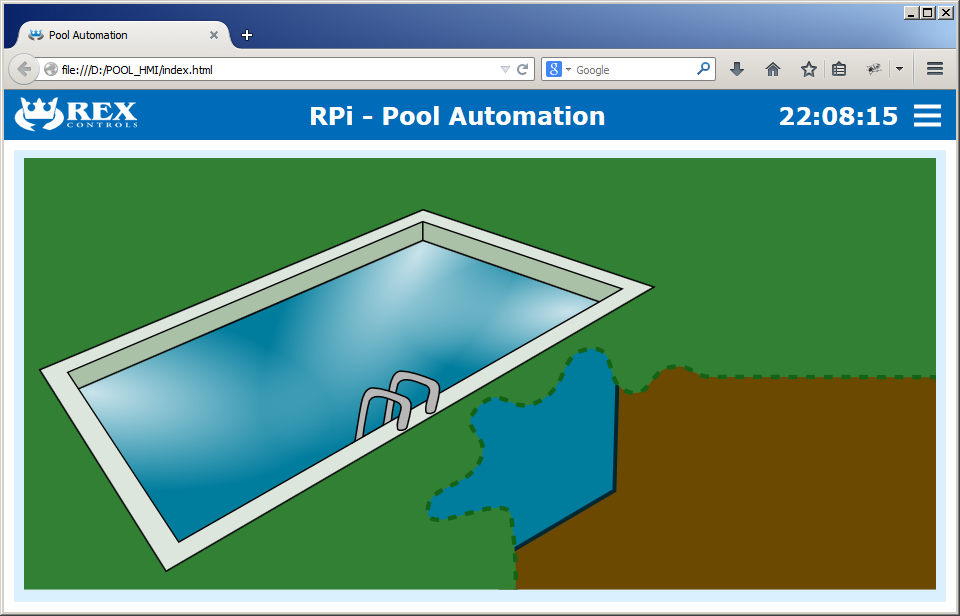
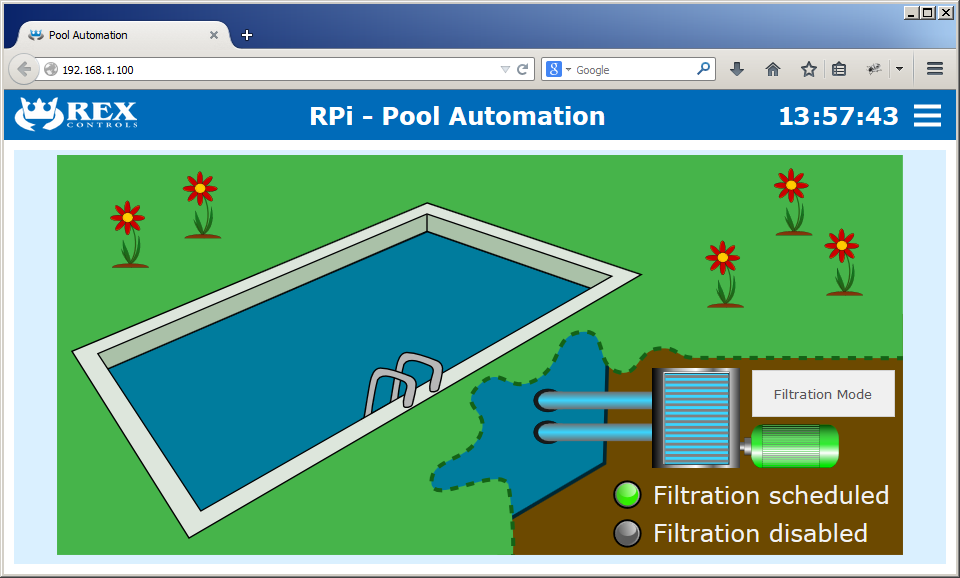
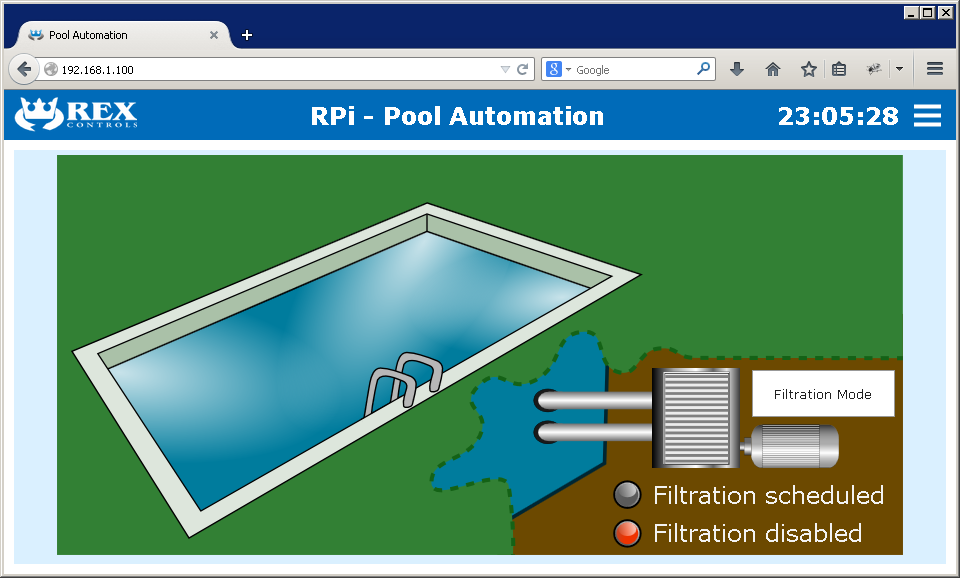
- Locate the HMI on your drive and open the index.html file in your browser. Depending on the daytime, you should see one of the following images:
- Hopefully the HMI is working on your desktop computer. But you want to store the HMI files on your Raspberry Pi so you can access it from anywhere in your house with your tablet or smartphone, right?
- For this purpose, return to Inkscape and open the HMI configuration dialog. Once you will move the HMI to your Raspberry Pi, both the HMI and the control algorithm will run on the same machine, therefore it is not necessary to define the address of the websocket server anymore. Delete the address from the HMI configuration.
- Export the HMI from Inkscape again. Now it is ready for copying to your Raspberry Pi. Once copied there it will work regardless of the IP address of your Raspberry Pi.
- Copy the HMI to your Raspberry using the RexView program.

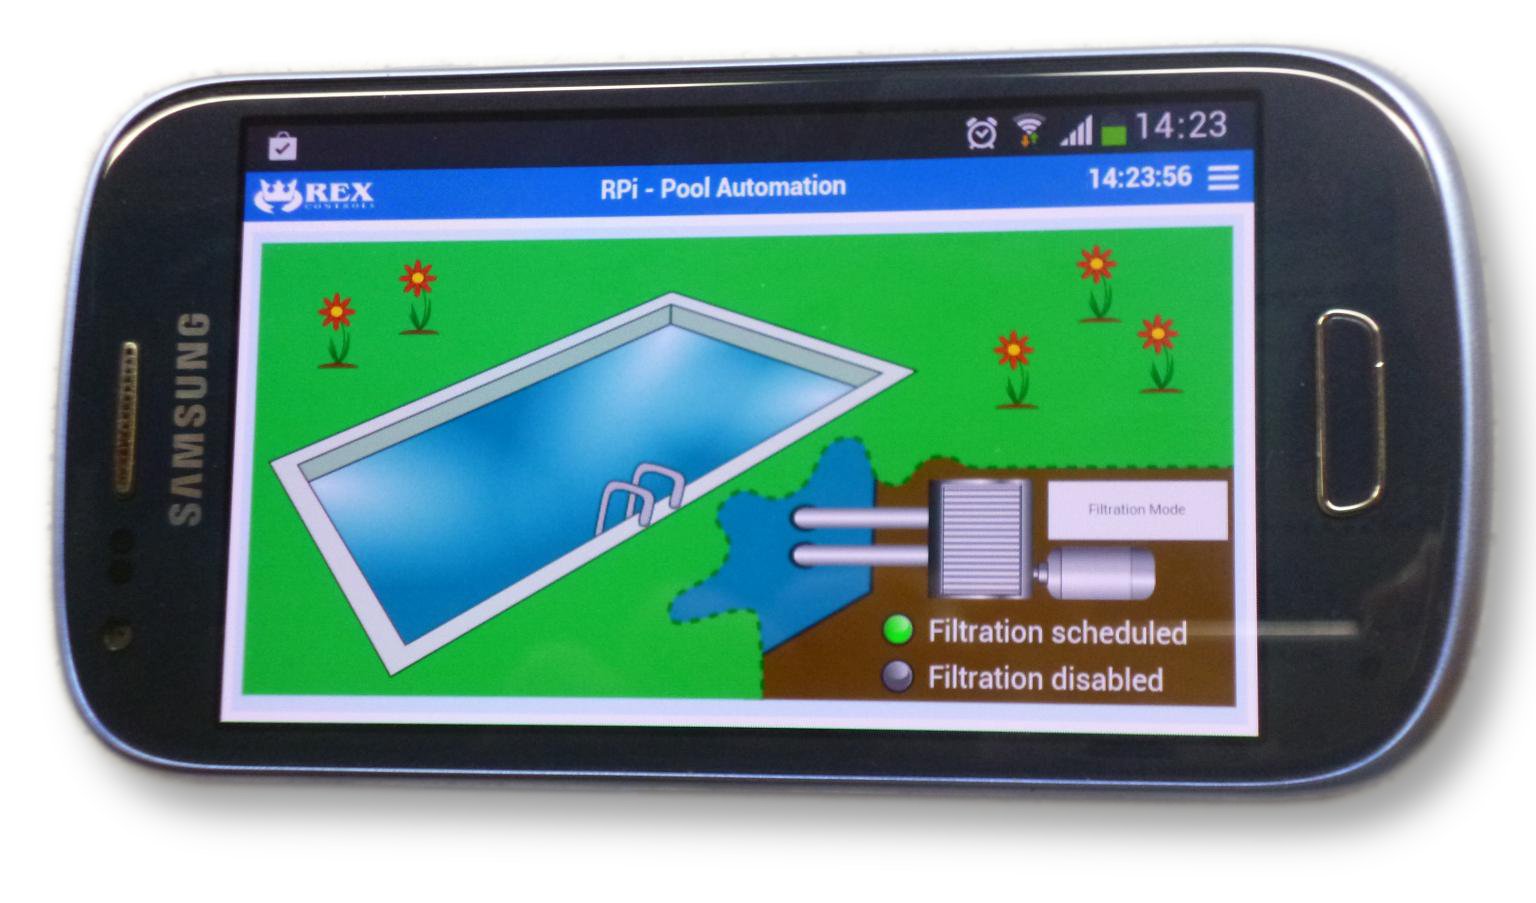
- Now you may enter the IP address of your Raspberry Pi in the address field of your browser on your tablet or smartphone and you should see the HMI.
- Because all the necessary software is running on the Raspberry Pi, you can access the HMI from any device within your home network. No cloud services, no specialized apps.
Troubleshooting
Got stuck at any point? Found a bug? Missing a feature? We want to hear about it, do let us know.
Is that it?!
No it is not. The next tutorial will show how to integrate the components from the RexHMI library in your HMI so you will be able to create more detailed HMI and also control your pool just like in the case of WebBuDi HMI.
However, you may explore the final version of the HMI for pool automation right now, it is included in our GitHub repository as well.
Additional information
You can also:
- Read the Getting started guide and watch our Getting started video which both explain a PID control loop example.
- Explore the rich function block library of the REX Control System.
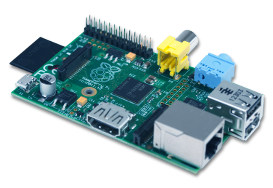
- Visit the Raspberry Pi Foundation webpage, where you can find more information about the Raspberry Pi minicomputer.
Raspberry Pi is a trademark of the Raspberry Pi Foundation.
updated: 2017-05-19